


WinSCP (Windows Secure Copy) is a free, open-source file transfer software that supports SFTP, SCP, FTP, and WebDAV on Windows. This article provides a detailed guide on installation, server connection, file upload/download, firewall configuration, and troubleshooting connection issues.
High-Speed Proxy - Ready to Try?
ALGO Proxy offers residential, datacenter & 4G proxies in 195+ countries
What is WinSCP?
What is WinSCP? WinSCP (Windows Secure Copy) is a free, open-source application for Windows that functions as an SFTP and FTP client. The application is designed for secure file transfer and file management, helping users connect and exchange data between their personal computer and remote servers efficiently.
WinSCP provides core functions such as ensuring safety and security in data transfer through FTP, SFTP, and WebDAV protocols. The application's interface is divided into two sections: the left side displays the file and folder structure of the local computer, while the right side shows the remote server, making it easy to copy files between systems.
WinSCP was developed by Kateřina Šrámková and released in late 2000. The first version, WinSCP 1.0, only supported the SSH-1 protocol. However, through subsequent updates, WinSCP has continuously expanded its capabilities, including support for SSH-2, SFTP, and FTP.
WinSCP is not just a file transfer tool but also a symbol of continuous progress and improvement in quality and features. Since its inception, WinSCP has become a reliable solution for data management and transfer, with regular updates to integrate multiple languages and support new protocols such as WebDAV, meeting the ever-growing needs of users in today's technology era.

Development History of WinSCP
What is the development history of WinSCP? WinSCP was first developed in 2000 by Martin Přikryl, a Czech programmer. From a simple tool, WinSCP has gradually become one of the most popular file transfer software on the Windows platform. The development history of WinSCP spans several phases with important updates, including:
- WinSCP was developed in late 2000 by Kateřina Šrámková. The first version, WinSCP 1.0, only supported the SSH-1 protocol.
- In October 2001, WinSCP 2.0 beta was released, supporting the SSH-2 protocol with public key authentication, along with interface improvements and several new features.
- Continuing the development, version 2.2 (non-beta) was released in January 2003.
- In June 2003, WinSCP 3.0 was officially released, adding support for the SFTP protocol. However, it wasn't until June 2007 that WinSCP 4.0 introduced FTP protocol support, meeting user needs at the time.
- Throughout the development process, WinSCP has continuously improved by integrating various languages, making it easier for users to access and use the interface.
- Finally, the WebDAV protocol was added to WinSCP in version 5.6, released in July 2014, to best serve user needs.
Looking back at WinSCP's development history, it is clear that the software has gone through many phases of improvement and feature expansion to meet the ever-growing demands of users. Through this, users can trust WinSCP for their data management and transfer needs in the modern networking environment.
Advantages of WinSCP
What are the advantages of WinSCP? WinSCP is popular thanks to its many outstanding advantages that improve the user experience in file transfer and management. Below are the key advantages of WinSCP:
- User-friendly interface: WinSCP features an easy-to-use graphical interface, providing two popular interface modes — Explorer and Commander — allowing users to choose based on personal preference.
- Multilingual support: The application supports many popular languages worldwide, making it accessible to users from various countries.
- Windows integration: WinSCP easily integrates with the Windows operating system through drag-and-drop file functionality, URLs, and shortcut icons.
- U3 protocol: The application supports U3 protocol setup, optimizing performance and convenience during use.
- Multi-protocol support: WinSCP supports SFTP and SCP through SSH-1 and SSH-2, along with several other FTP protocols.
- Built-in file editing: WinSCP provides basic text file editing functionality, allowing users to perform operations without switching to another application.
- Multiple file management: Users can interact with multiple files simultaneously, enhancing productivity and convenience.
- High security: The application supports SSH passwords for secure interaction, along with security authentication mechanisms such as Public Key and Kerberos.
- PuTTY – Pageant integration: WinSCP integrates well with the PuTTY – Pageant authentication system, providing a secure connection experience.
- Portable application: WinSCP functions as a portable application, allowing users to copy it to mobile devices and conveniently use it on computers running Windows.
With these advantages, WinSCP meets the need for secure data transfer, delivering an efficient file management experience for users on the Windows platform.
Thanks to the advantages above, WinSCP has become one of the most popular tools for remote file management and data transfer on Windows, trusted by many users and IT professionals.

Quick and Efficient WinSCP Installation Guide
Now that we know what WinSCP is — WinSCP is a popular FTP application for Windows, supporting secure protocols such as SFTP, FTPES, and unencrypted FTP. Below is a guide to installing WinSCP quickly and efficiently:
Step 1: Download and extract WinSCP
- Visit the official WinSCP website to download the latest version.
- Choose the version compatible with your device: 32-bit or 64-bit.
- Download and save the WinSCP installation file to your computer.
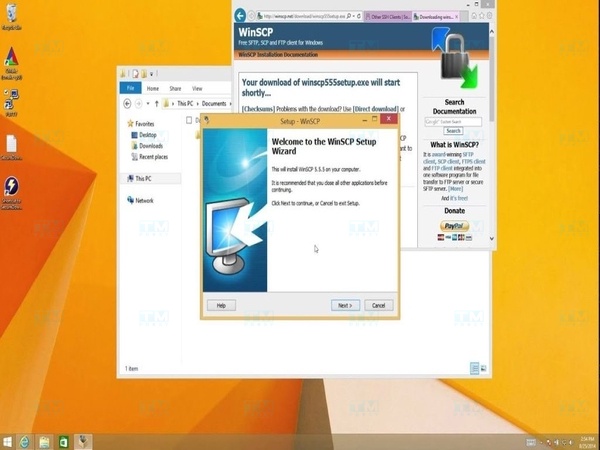
Step 2: Install WinSCP
- Open the downloaded WinSCP installation file.
- Select the desired language during installation and click OK.
- Select "Installation" from the left menu and click "Install" to begin the installation process.
Step 3: Complete the installation
Wait for the installation to complete, then click "Finish" to close the installation window.
Step 4: Use WinSCP
- Open WinSCP from the Start menu or the desktop icon.
- Enter connection details, including Hostname, Username, Password, and Protocol.
- Click "Login" to establish the connection.
Note: If you are using SFTP cPanel access or an FTPES account, create and use the corresponding connection credentials.
Important note: The WinSCP installation process may vary depending on the provider. Refer to specific instructions from your trusted provider to ensure accuracy and efficiency during installation.

Specifically:
SFTP Connection:
- File Protocol: SFTP.
- Hostname: The server hosting your website.
- Port: 21098.
- Username: Your cPanel username.
- Password: Your cPanel password.
FTP Connection:
- File Protocol: FTP.
- FTP Encryption: Explicit TLS.
- Hostname: The server hosting the user's website.
- Port: 21.
- Username and Password: The FTP account name and password.
Note that passwords should not contain leading or trailing spaces, as this helps avoid common errors when users copy passwords from setup emails.
Transferring files
After successfully connecting, you will see a directory listing. The FTP client provides features such as drag-and-drop along with a graphical interface to facilitate file transfer. For large files, ensure your internet connection is stable.
What is Cloud VPS? Pros, Cons, and How to Create a Cloud VPS
If the FTP server still cannot connect after you have entered correct credentials, consider temporarily disabling antivirus software or the firewall, as they may block the connection.
With the steps above, you have successfully installed WinSCP on your computer and are ready to use it.
How to Use WinSCP Simply
How to use WinSCP? WinSCP is a powerful yet very easy-to-use tool for transferring files between a personal computer and a remote server. To use WinSCP simply and efficiently, you need to go through the steps from connecting to the server, managing files, and performing basic operations proficiently. Below is a detailed step-by-step guide to using WinSCP simply.
After completing the WinSCP installation, you can refer to the simple usage guide below:
Downloading and connecting your account
Step 1: Open WinSCP and select "Stored sessions". Click "New" if this is your first time using it.
Step 2: Enter the complete connection details for the FTP Server, including:
- Host address: Enter agu.edu.vn.
- Username: Enter your account name (UserId).
- Password: Enter your password.
- File Protocol: Select FTP.
- Encryption: Select TLS Explicit encryption mode.

Step 3: Click "Save" to store the connection details for future use, then click "OK".
Step 4: Click "Login". Confirm the connection password by entering your password and clicking "OK".
Step 5: When the system requests certificate confirmation, click "Yes".
After a successful connection, you will see the interface displaying two data areas: one for the local computer and one for the server.
Uploading and Downloading Files with WinSCP
To upload or download documents, follow these steps:
Uploading files with WinSCP:
Navigate to the corresponding file or folder in the left panel. Right-click on the file or folder you want to upload, then select "Upload".
Downloading files with WinSCP:
Navigate to the corresponding file or folder in the right panel. Right-click on the file or folder you want to download, then select "Download".

Connecting is the first and most important step when using WinSCP. You need the remote server login credentials to successfully connect.
- Open WinSCP: Double-click the WinSCP icon on the desktop or search for it in the Start menu.
- Login window: After opening WinSCP, the login window will appear, and you need to fill in the following information:
- File protocol: Select the connection protocol. Typically, you'll choose SFTP (secured via SSH) or FTP.
- Host name: Enter the IP address or domain name of the server (e.g., example.com or 192.168.1.1).
- Port number: The connection port, default is 22 for SFTP and 21 for FTP.
- Username: Your login name on the server.
- Password: Your account password.
- Save login credentials: To save time for future logins, you can click the Save button to store your login information.
- Connect: Click the Login button to begin connecting to the server. If the connection is successful, WinSCP's main window will display the remote server's file system.
Connecting to a remote server via WinSCP allows you to manage and transfer files quickly and securely. With support for multiple protocols such as SFTP, SCP, and FTP, WinSCP is an ideal tool for both system administrators and individual users who need to access remote servers, ensuring data is transferred safely and efficiently.
Frequently Asked Questions About WinSCP
What are the frequently asked questions about WinSCP? WinSCP is a popular tool for transferring and managing files between a personal computer and a remote server. With its variety of features and supported protocols like SFTP, SCP, and FTP, many users may have questions during use. Below are some frequently asked questions about WinSCP, helping you better understand how the tool works, its installation, and how to optimize its use for efficient file management.
How to Download WinSCP Safely
If you don't want to download WinSCP from the official website or from unreliable sources, you can choose to download the application from the Microsoft Store on your computer. However, the Microsoft Store version is not free — you will need to pay $10 USD to use it.
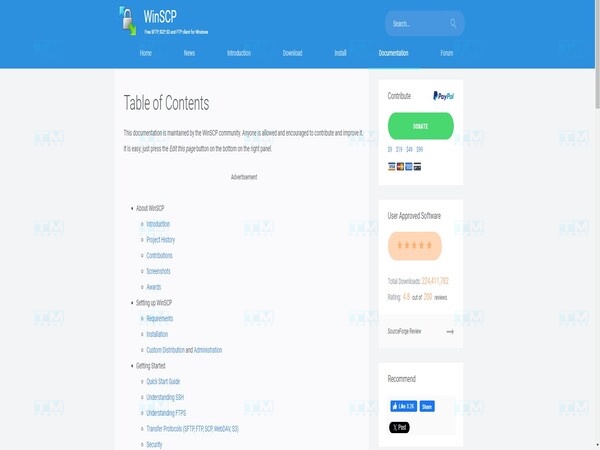
Where to Find WinSCP Documentation
To find WinSCP documentation, you can visit the Documentation section on the official software website at winscp.net/eng/docs/start. There, you will find detailed guides on installing, configuring, and using WinSCP features, from basic to advanced.
Additionally, the FAQ and Forum sections on the website provide useful information from the user community and developers. If you need to learn about command-line usage or scripts, the Scripting and Automation section is an excellent resource. All documentation is available in multiple languages, making it easy to access and acquire the knowledge needed to use WinSCP effectively.
Causes and Fixes When WinSCP Cannot Connect to a Server
When using WinSCP for data management and transfer, being unable to connect to a server can cause significant inconvenience and work disruption. Below are some common causes and their fixes:
- Incorrect login credentials: Ensure you have entered the correct IP address or domain name of the server, connection port, username, and password. Pay particular attention to uppercase and lowercase characters, as they can affect login.
- Server is not running: Check whether the server you are trying to connect to is operational. You can try pinging the server's IP address or use other tools to check the server's status.
- Incorrect connection protocol: Ensure you have selected the correct connection protocol (SFTP, SCP, FTP, WebDAV, or S3). If the server does not support the protocol you are using, the connection will fail.
- Firewall or proxy settings: A firewall or proxy may block WinSCP's connection to the server. Ensure that the connection ports (typically port 22 for SFTP or port 21 for FTP) are open on both your computer and the server. If using a proxy, configure it correctly in WinSCP's Preferences.
- Public key authentication failure: If you use public key authentication, make sure your public key is properly installed on the server and your private key is correctly selected in WinSCP. Also ensure the format and access permissions of the key files are correct.
- Server overload or software errors: If the server is overloaded or experiencing errors, the connection may be refused. Try reconnecting after a few minutes or contact the server administrator.
To resolve the issues above, you can re-check the connection details, try changing the protocol or connection port, and review firewall and proxy settings. If the problem persists, check the detailed error messages that WinSCP provides for more specific information about the cause.
How to Configure WinSCP to Bypass Windows Firewall
To allow WinSCP access through the firewall on most Windows versions, follow these steps:
- Go to Control Panel and select System and Security.
- Next, go to Windows Defender Firewall and select Allow an app or feature through Windows Defender Firewall.
- Find and allow the winscp.exe file through the firewall.
With the steps above, you can configure WinSCP to bypass the Windows firewall effectively, enabling smooth connections and data transfers.
{{< test-result title="Comparison of Popular File Transfer Software" headers="Criteria|WinSCP|FileZilla|Cyberduck|PuTTY (PSFTP)" row1="Platform|Windows|Windows, Mac, Linux|Windows, Mac|Windows" row2="Protocols|SFTP, SCP, FTP, WebDAV, S3|SFTP, FTP, FTPS|SFTP, FTP, S3, WebDAV|SFTP, SCP" row3="Interface|Explorer / Commander|Tab-based|Bookmark-based|Command line" row4="PuTTY Integration|Yes (Pageant)|No|No|Yes (PuTTY itself)" row5="Scripting|Yes (.NET, COM)|No|Yes (CLI)|Yes (batch)" row6="Price|Free|Free|Free|Free" />}}
Conclusion: WinSCP is a free, open-source file transfer software that supports SFTP, SCP, FTP, and WebDAV on Windows. With its intuitive interface, PuTTY/Pageant integration, and powerful scripting capabilities, WinSCP is an indispensable tool for system administrators and users who frequently work with remote servers.