


Setting up proxy for WiFi on Android helps with anonymity, security, and accessing restricted content. This article guides you through setting up proxy for existing WiFi and new WiFi networks, manual and automatic configuration, along with useful proxy management apps.
High-Speed Proxy - Ready to Try?
ALGO Proxy offers residential, datacenter & 4G proxies in 195+ countries

How to Set Up Proxy for Existing WiFi on Android
When you already have an existing WiFi connection and want to set up a proxy for it, the process is quite simple and quick. Below are the specific steps for you to set up proxy for WiFi:
When connected to a Wi-Fi network, you can change the settings to use a specific proxy server each time you connect. To do this, follow these steps:
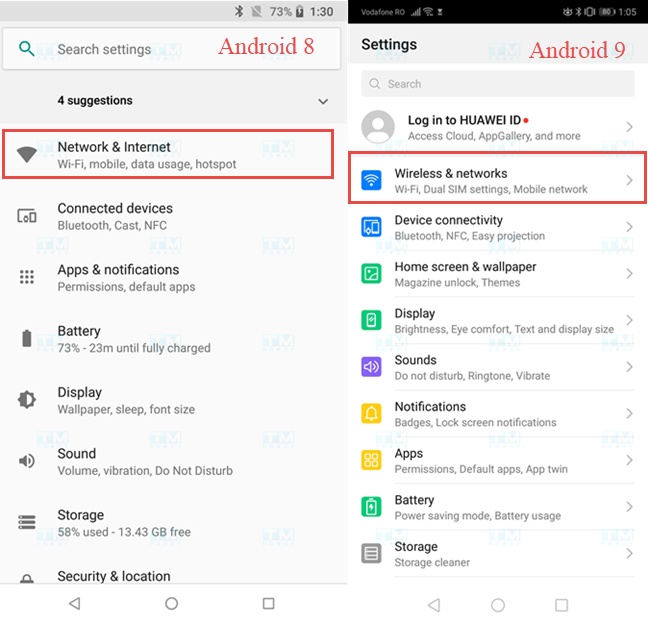
- Step 1: Open the Settings app: First, open the Settings app on your Android phone or tablet. For Android 8 Oreo, tap Network & Internet. For Android 9 Pie, select Wireless & networks.
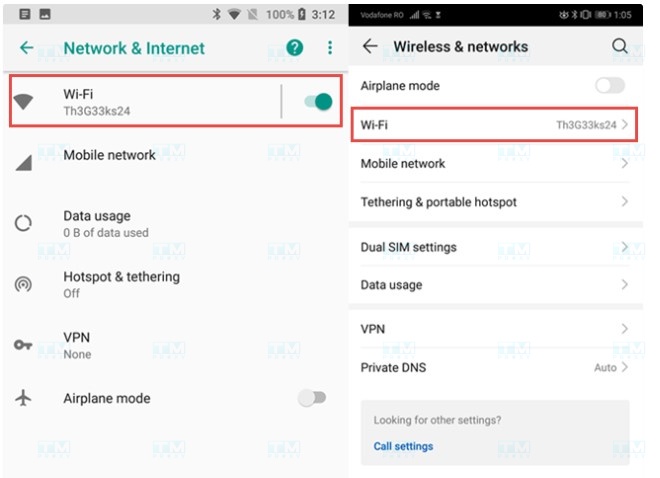
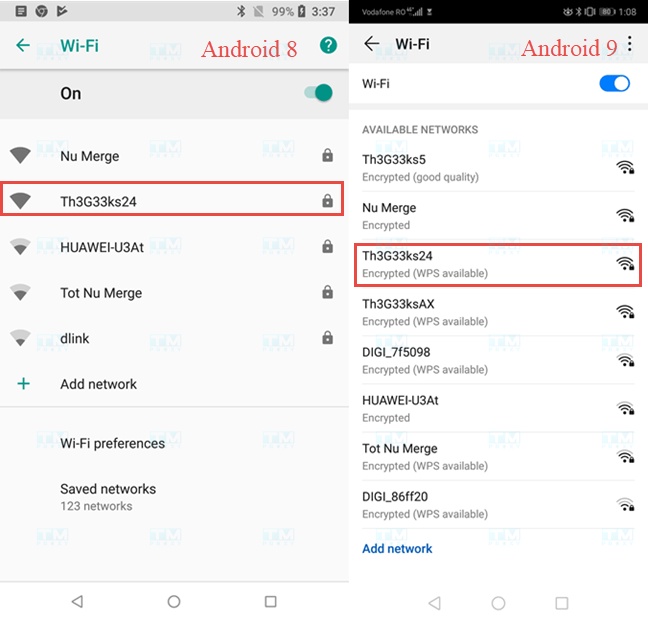
- Step 2: Select Wi-Fi: Next, tap Wi-Fi to display the list of available wireless networks in your area.
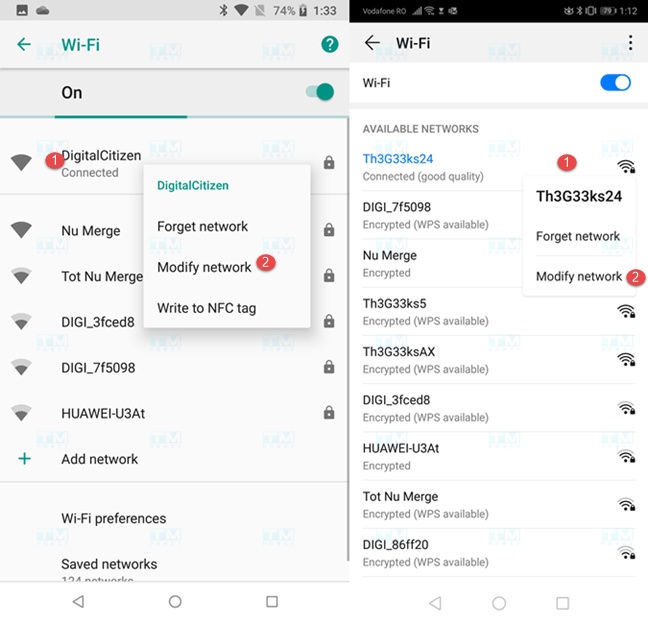
- Step 3: Edit Wi-Fi network: In the Wi-Fi networks list, long press on the network name you are connected to. A context menu will appear, select Modify network to adjust the proxy settings for that network.
What is SSH? Functions and Working Principles of SSH Protocol
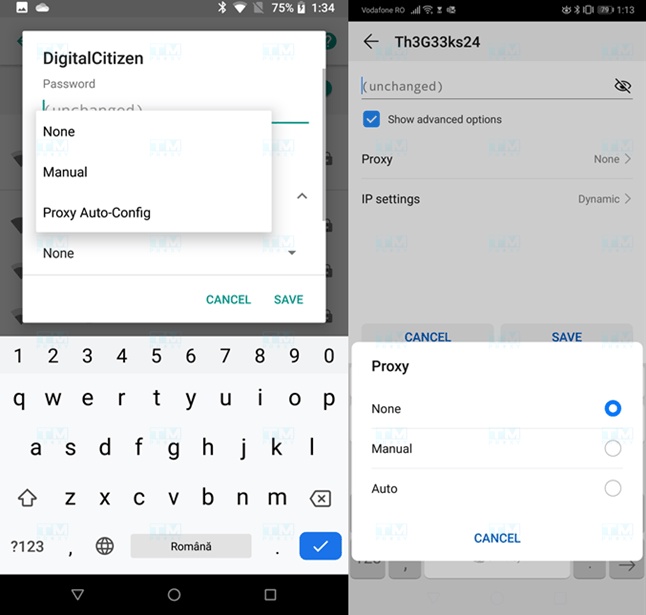
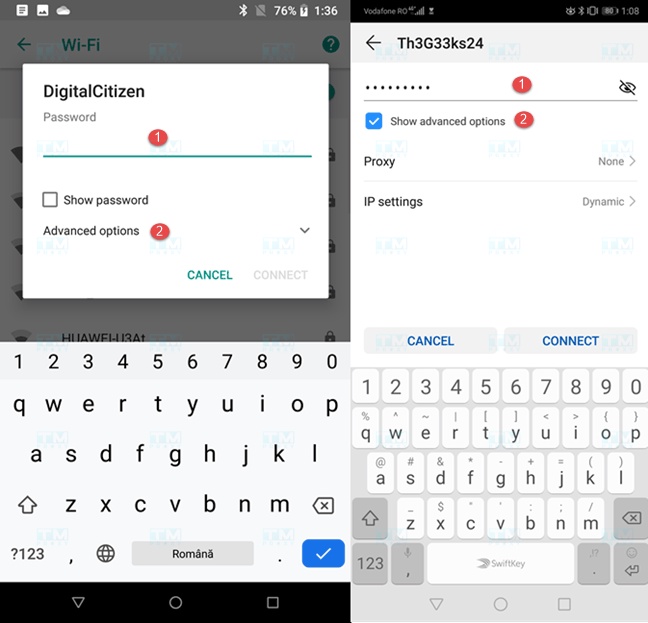
- Step 4: Show advanced settings: You will see a panel of settings for the current network connection. Tap Advanced options or select Show advanced options to display additional configuration options, including proxy-related settings.
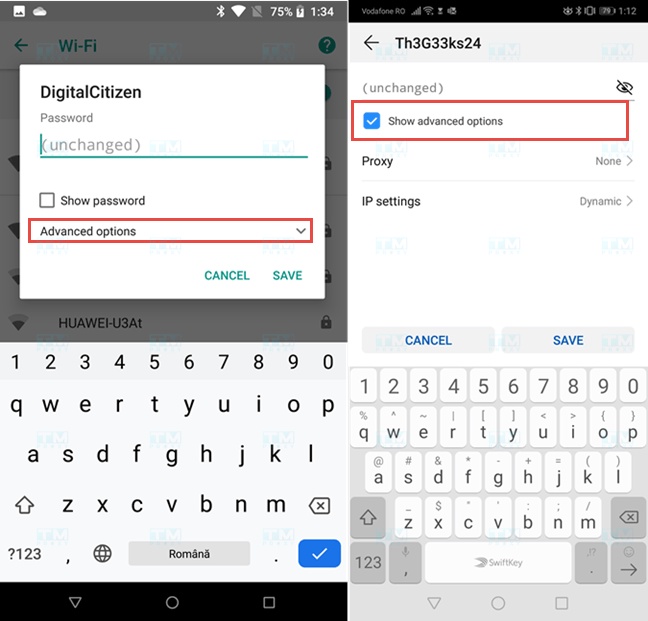
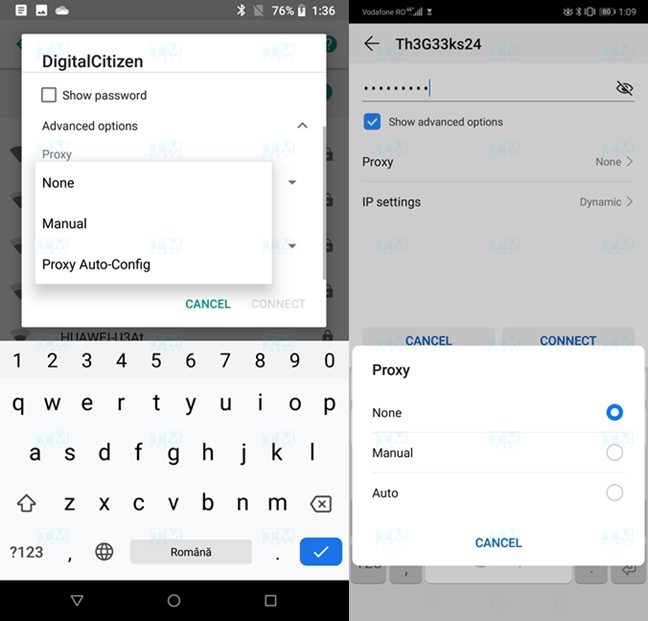
- Step 5: Select Proxy option: Scroll down and find the Proxy section. You can choose between manual or automatic proxy configuration. If using Android 9 Pie, select Auto to use an automatic proxy configuration address. These options are quite clear and easy to understand.
- Step 6: Manual Proxy configuration: If you select Manual, you will need to enter the IP address or hostname of the proxy server you want to use (e.g., proxy.example.com). Then, enter the port (usually port 8080, the default port for most proxy servers).
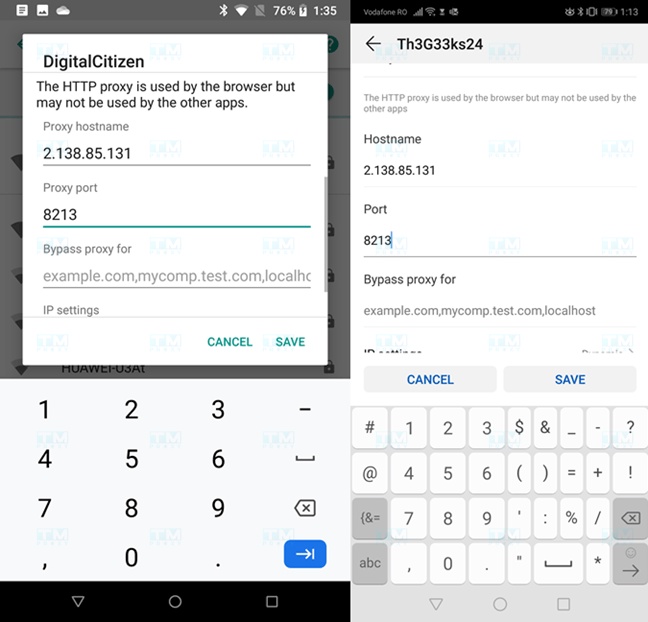
You can bypass the proxy for certain specific websites by entering their addresses in the Bypass proxy for field. After completing, tap Save to save the settings.
Note: If you want to set the proxy server as localhost (local server), enter localhost instead of an IP address in the hostname field.
- Step 7: Automatic Proxy configuration: If you select Proxy Auto-Config (on Android 8) or Auto (on Android 9), you will need to enter the URL of the proxy server or proxy configuration script (e.g., https://www.example.com/proxy.pac).
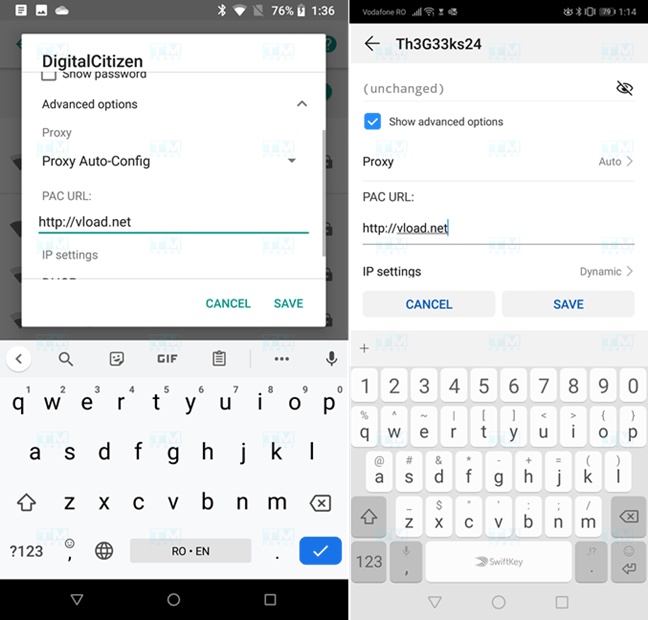
Step 8: Save settings: After entering all the information, press Save to apply the settings. From now on, Android will use the proxy server you set up each time it connects to this Wi-Fi network.
With the above steps, you can easily configure proxy for Wi-Fi connections on your Android device, helping to enhance security or improve browsing performance.
How to Set Up Proxy When Connecting to a New WiFi Network on Android
Android allows you to easily set up a proxy during the process of connecting to a new Wi-Fi network. Follow these steps:
What is Cloud Hosting? Everything You Need to Know About Cloud Hosting
Step 1: Start connecting to the new Wi-Fi network: In the list of available Wi-Fi networks, tap on the network you want to connect to.
Step 2: Enter password and access advanced settings
If the network requires a password, enter the password in the corresponding field. Before pressing Connect, tap Advanced options or select Show advanced options to display additional configuration options.
Step 3: Select Proxy option
In the Proxy section, you can choose between two options:
- Manual (Manual configuration): Manually enter proxy information.
- Proxy Auto-Config (Android 8) or Auto (Android 9): Use an automatic proxy configuration address.
If you select Manual, you need to:
- Enter the hostname or IP address of the proxy (e.g., proxy.example.com).
- Enter the proxy port number (usually 8080). You can also add websites you want to bypass the proxy for by entering their addresses in the Bypass proxy for field.
Step 4: Enter URL for automatic configuration (if selecting Auto)
If you select Proxy Auto-Config or Auto, you need to enter the URL of the proxy configuration script (e.g., https://www.example.com/proxy.pac) or the URL address of the proxy server.
Step 5: Connect to the network: After completing the configuration, press Connect to establish the connection.
Step 6: Notes on proxy configuration
If you want to set the proxy as localhost (local device), enter localhost in the hostname field instead of an IP address. Make sure the proxy information is entered correctly for a stable connection. After successfully connecting, the Android device will use the configured proxy settings each time it connects to this Wi-Fi network, providing a safer and more efficient browsing experience.
Besides manually performing the above steps, you can also use proxy management apps to simplify this process. Some popular apps provide user-friendly interfaces, making it easy to set up and switch between different proxies.
- ProxyDroid: This is an app that allows you to manage multiple proxy profiles. You can easily switch between profiles or create new ones as needed.
- Orbot: A Tor-based proxy app, Orbot helps you browse anonymously and effectively protect personal information. This is an ideal choice if you want to optimize your online safety.
- VPN: VPN apps can also function as a proxy. However, VPNs usually provide more security features and stronger encryption compared to regular proxies.
What is DHCP? Overview of the IP Address Assignment Protocol
Thanks to these apps, you can be more flexible in managing proxy connections, saving time and effort in setting up multiple proxies for different WiFi networks.
{{< test-result title="So sanh cau hinh Proxy thu cong va tu dong" headers="Tieu chi|Thu cong (Manual)|Tu dong (Auto)" row1="Cach nhap|IP va Port cu the|URL script PAC" row2="Do linh hoat|Thap|Cao" row3="Phu hop|Ca nhan, 1 proxy|Doanh nghiep, nhieu proxy" row4="Do kho|De|Trung binh" row5="Thay doi proxy|Nhap lai thu cong|Tu dong qua script" />}}
Conclusion: Setting up proxy for WiFi on Android is quite simple with two methods: manual configuration (entering IP and Port) or automatic configuration (entering PAC script URL). You can set up proxy for existing WiFi or when connecting to a new network. Use apps like ProxyDroid or Orbot to manage proxies more easily.