


Creating an online proxy helps you browse the web anonymously, securely, and bypass geographical restrictions. This article guides you through creating a proxy using PHP-Proxy, installing SSL, and configuring proxy settings on Windows 10/11.
High-Speed Proxy - Ready to Try?
ALGO Proxy offers residential, datacenter & 4G proxies in 195+ countries
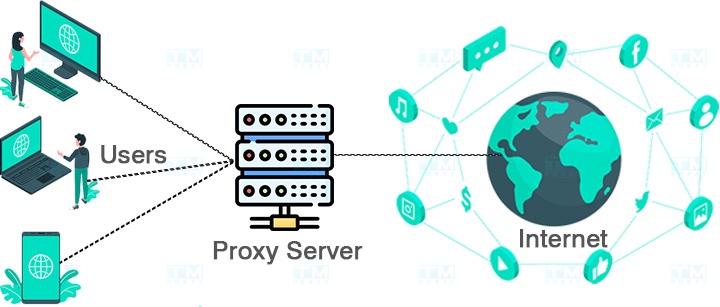
What Is a Proxy Server?
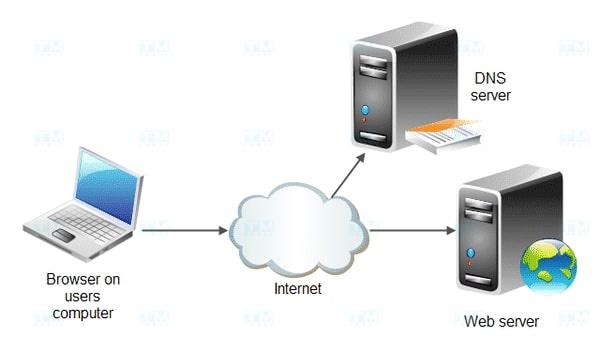
A proxy is a server that acts as an intermediary between the user and the internet. Many businesses use proxy servers for security reasons, as they can function as a firewall or protect user data privacy.
Additionally, you can use a proxy to bypass firewalls, allowing you to access the internet freely despite network restrictions. Below is a detailed and quick guide on how to create a proxy.
Requirements for Creating Your Own Proxy Server
If you want to create a proxy quickly, there are some requirements to keep in mind:
- Web server: In theory, any web server can be used as long as it meets the other requirements. You can use an old computer or even a free online web server.
- PHP7 or higher and cURL: You need to ensure that your web hosting supports PHP7 and cURL. If you are using a paid hosting service, these features are most likely already available. Note that cURL is typically disabled on most free servers.
- Access permissions: Some web servers may prohibit the creation of online proxy servers, so you should check this before getting started.
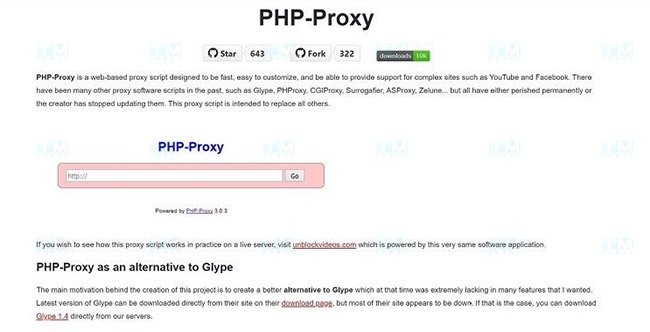
Download and Install PHP-Proxy
PHP-Proxy is a free, standalone PHP script that is lightweight and easy to configure. You can download it from the official website.
After downloading, upload the files to a subdirectory on your web server. If there is a folder named 'www' or your domain name, create a subdirectory within it. Avoid using the word "proxy" in the folder name, as some providers may detect it. Instead, use words like "web" or "surf."
Here are some methods for uploading files, from easiest to most complex:
- Upload and extract ZIP: Find the "unpack" or "extract" option in your file manager. This option may vary depending on your web host. If you cannot find it, ask your support service for help. Then, extract the proxy files into your public directory.
- FTP access: You can use an FTP application to access your web server and transfer files. This option is supported by most hosting providers.
- Manual upload: The last resort is to upload all files and directory structures manually. If you have to do this, consider finding a different hosting provider that may work better.
Ready to Use PHP-Proxy
After completing the installation and configuration of PHP-Proxy, you now have a working proxy server. However, to take full advantage of the benefits a proxy server provides, you need to perform some additional configuration steps.
After installing the files, there is one important step remaining. You need to edit the "config.php" file and add a random value to the
$config['app_key'] = ' ';
section between the quotes. Once filled in, save the file, and your proxy will be ready to use.
Simply open your browser and navigate to the directory where you placed the files (e.g., domain.com/surf), and PHP-Proxy will appear. You can enter any URL into the search bar and browse the web freely.
After setting up PHP-Proxy, you can use it as you wish. Proxies like this will hide your IP address, allowing you to search anonymously and access restricted content.
Guide to Installing SSL Encryption
Although you can continue using PHP-Proxy without any additional steps, this is not ideal. To ensure safe use of your proxy server, you should install SSL encryption, which PHP-Proxy does not include by default. Fortunately, this step is quick and easy to complete.
You will need a free automatic certificate tool called Certbot. Visit the Certbot website at https://certbot.eff.org/instructions, and you will receive specific instructions on how to install it based on your operating system and server.
What Is a Cloud Server? Features, Benefits, and Applications of Cloud Server
When you see "YourDomainName.com" in the installation commands, replace it with your actual domain name. At the end of the process, Certbot will ask if you want to redirect all traffic to HTTPS. Choose the redirect all option, as this is the best choice to help you use PHP-Proxy securely.
How to Create a Proxy in Windows 10
If you use Windows 10, the operating system provides a built-in method to set up a proxy server.
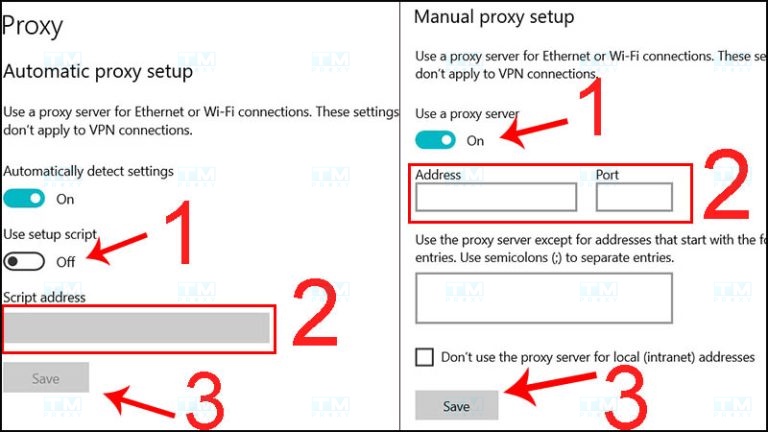
First, open Settings, then select Network & Internet. Next, click on Proxy, and make sure that Automatically detect settings is turned on. Then, enable Use setup script and enter the script address for the proxy you want to use. When finished, click Save, and Windows will automatically route internet traffic through the proxy.
If Windows has difficulty detecting the proxy, you can configure it manually. In the Proxy settings, toggle Use a proxy server under Manual proxy setup to the on position. Instead of entering a script address, you will enter the IP address and port number of the proxy.
This information can be provided by your internet service provider. After filling in all the required fields, click Save and you will be able to use your proxy.
How to Set Up a Proxy in Windows 11
Like Windows 10, Windows 11 also has built-in proxy server settings. The fastest way to access these settings is to press the Windows key and type "Change proxy settings." Then, select the first option in the list.
To enable automatic settings detection, simply turn on "Automatically detect settings," then click "Set up" next to "Use setup script." Then, enable "Use setup script" and enter the proxy script address in the dialog box that appears, then click "Save."
If you want to configure the proxy manually, click "Set up" under the "Manual proxy setup" section in the proxy settings. Enable "Use a proxy server" and enter the IP address and port number of the proxy you want to use. You can also enter addresses that you do not want to go through the proxy. After filling in all the information, click "Save."
What Is PHPMyAdmin? Detailed Installation and Usage Guide for PHPMyAdmin
Browse the Web Freely and Securely
After completing the proxy server setup and browser configuration, you will be able to browse the web more freely and securely. A proxy server hides your real IP address, providing anonymous browsing capability and preventing tracking by tech companies or government agencies -- this is especially useful if you are concerned about personal data being collected.
Additionally, a proxy helps you bypass geographical restrictions on some websites. Many websites only allow access from specific regions, but with a proxy, you can easily access blocked content, from videos to articles.
Another notable benefit of a proxy is protecting personal data. Communication between your device and websites is encrypted, helping protect your personal information from theft threats.
Furthermore, a proxy server also allows you to control and monitor the websites you visit, helping you manage internet usage time more effectively. If you are a parent, this is a useful tool for monitoring and limiting the content your children can access.

Additionally, you can control and monitor the websites you visit, helping you manage internet usage time more effectively. If you are a parent, this will help you monitor and limit the content your children can access.
{{< test-result title="So sanh cach tao va cau hinh Proxy" headers="Tieu chi|PHP-Proxy|Windows 10/11 Auto|Windows 10/11 Manual" row1="Do kho|Trung binh|De|De" row2="Can server|Co|Khong|Khong" row3="Ma hoa SSL|Can cai them|Tuy proxy|Tuy proxy" row4="Linh hoat|Cao|Trung binh|Trung binh" row5="Phu hop|Developer, IT|Nguoi dung ca nhan|Nguoi dung ca nhan" />}}
Conclusion: Creating an online proxy is quite simple with PHP-Proxy: you just need a web server with PHP7 and cURL, upload the script, configure the app_key, and install SSL. On Windows 10/11, you can configure a proxy automatically or manually through Settings. Proxies help with anonymity, security, and bypassing geographical restrictions.